4 Ways Prep Makes Your Paint Job Last Longer
Posted Jan 27, 2020 by Dave Scaturro

If you are investing your budget into a paint project, wouldn’t you rather have it done right the first time? Great preparation is proven to help your paint project last longer, look better and prevent common problems such as chipping, peeling, and mold growth. When hiring a professional painting contractor ensure they follow these guidelines below and your project will sure to be worth your time and investment.
Step 1: Prep the Work Area
Interior: For interior projects, the first thing you would want is to either remove all of the furniture from the area or place it in the center of the room and cover it with drop cloths. A separate drop cloth should be used to cover the exposed floor area. All fixtures, switch plates, outlet covers and window coverings from the walls should be removed and painter’s tape should be used to protect all areas that shouldn't need paint touch ups.
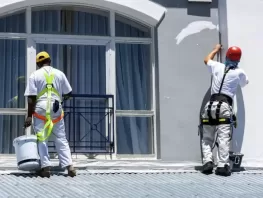
Exterior: For exterior projects, drop cloths should also be used to cover any areas that you don’t want to be exposed to paint. This can include cars, outdoor furniture, plants, driveways and walkways. Make sure to remove all window and door screens, light fixtures, electrical covers, and plumbing outlets. Lastly, all signs and/or lettering on your building should be covered with either plastic or painter’s tape, depending on the size.
Step 2: Clean and Repair Surfaces
Interior: Since paint does not adhere to dirt or damaged areas, surface repair is a vital step in the painting process. With that being said, at least one day should be dedicated to this step in your project schedule, especially if there are evident repairs needed.
Exterior: When preparing exterior walls all peeling and flaking paint should ideally be removed with sandpaper, scrapers or via pressure washing.
Step 3: Priming
Interior: Priming your interior surface is not necessary, but doing so will allow the paint to adhere and wear better. However, primer is necessary if your painting surface is stained or you plan on using a light-colored paint.
Exterior: Priming your exterior is important for staining and weathering purposes. When priming or painting the exterior of your building, it is advised to avoid doing so in direct sunlight. Why? Because the heat can dry the primer and paint before proper penetration and can cause oil-based paints to develop blisters.
Step 4: Painting
Interior: When painting the interior of your building, the main concern should be ventilation. Open windows while priming and painting will ensure that any pollutants are circulating out of the room.
Exterior: Before applying any paint to your exterior, the manufacturer’s temperature requirements she be checked. If the surface or weather is under 50ºF, effects such as cracking and improper film formation can occur. If the weather is too hot, the humidity can highly affect oil-based paints by turning the paint blotchy or showing color-variations in the film. Condensation can cause bleed or shadowing in the surface which may cause dark streaks, blotches, or glossiness on the paint film.
When hiring Alpine Painting as your trusted painting contractor we'll ensure we follow these guidelines and that your project is completed on time and on budget.
